Table of Contents
While COVID-19 shuttered many yoga studios and virtually all other businesses that depend on their physical location, resilient yoga instructors have found a way to pivot their yoga studio online and are seeing the benefits.
In this article, we’ll teach you the best way to teach yoga online by exploring the steps you need to take, and the equipment you’ll need. We’ll walk through common pitfalls, and cover strategies others have used to successfully digitize their studios.
For example, entrepreneur Cinderella De Groot created her Stress Relief Toolkit on Thinkific after COVID-19 halted her in-person fitness classes.

When, due to Covid-19, I unexpectedly had to shut down all my in person/group Relaxercise and Dance activities. I had to reinvent how to keep making a living, and that is how the Online Transformation Toolkits were created! CINDERELLA DE GROOT
Cinderella is part of a new wave of online course creators that were, out of necessity, nudged by COVID-19 to realize their digital potential.
Another yoga instructor, Lizzie Lasater along with her mom Judith have been teaching yoga on Thinkific for the past few years.
Lizzie noted that, while there’s been a sudden surge of demand for online yoga, the increased supply of online yoga resources has kept up – making it a competitive space.

I can’t wait to see what happens with this explosion of digital learning. I think we’re all going to up-level our game and I think there’s going to be a kind of collective consciousness that we’re going to learn how to practice and teach better online. So I’m very excited for that bright spot in this Corona Moment.LIZZIE LASATER
Why teach yoga online?
There are many benefits to teaching yoga online, compared to in-person.
To start, teaching online is far cheaper than in a physical space, and can even complement your physical classes.
The other benefits are scalability and lower overhead costs. By going online, you’re not constrained by your location or physical space, and you’re not paying rent – you’re able to service the entire market.
Beyond the numbers, online classes give you the flexibility to teach where you want, when you want.
Here are some of the biggest advantages of teaching yoga online:
1. Increasing demand for online yoga classes
When social distancing measures began in March, Google searches for ‘online yoga classes’ grew by about 530% compared to the preceding two months, signaling that yoga lovers aren’t ready to give it up without a fight.
We’re also seeing a growth in the supply of online yoga classes, with more instructors from other industries moving online as well.
Since the outbreak, the top three industries that saw the most increase in online course creation on Thinkific were health and fitness (up 279%), Art & Entertainment (up 334%), and Education (up 494%), when compared to pre-covid course creation rates.
Within the health and fitness category, the rate of yoga instructors creating online courses grew by about 300%, in comparing average courses created before the outbreak (mid-March), to two months after COVID.
2. Limitless potential
Online courses allow you to teach more people, and your earning potential is virtually uncapped.
Traditional yoga studios are limited to reaching a fraction of the overall Yoga market, since they can only serve people living in their area. Teaching online, you’re not limited by how many students you have in a class or where they live – you can serve a global market.
To put this in perspective, the yoga market in the US is worth about $12.8 bn, and there are an estimated 37 million people who practice yoga in the US. Imagine the impact you could have on your business by serving a global market on a steady growth trajectory.
3. Saves Money
With online courses, you don’t need to share your earnings with a Yoga studio or rent space for your class. Without the overhead of renting studio space, you can spend that rent money on marketing and production equipment (which we’ll get to later).
You can create up to 3 courses on Thinkific absolutely free, and potentially teach thousands of students without paying rent.
4. Social Distancing
While much of the world is slowly starting to open up, future waves of COVID-19 along with limited class sizes could continue to hinder Yoga and Fitness classes for a while. And now that thousands of students have experienced online yoga, we expect this demand to continue on into the future.
5. Teach from anywhere
The beauty of digital products is that they can be consumed anywhere, any time; all you need is wifi.
If you’re complementing live classes with pre-recorded classes on Thinkific, you can teach Yoga in your sleep (literally).
Teaching yoga online will give you the freedom to take extended vacations or, in Lizzie’s case, travel less.
I travel a lot less now because I can stay in one place and teach online. Which is something I feel good about in a kind of an environmental sense. The past couple of years before I had the twins and as I was growing my online work, I was traveling a lot. Digital has the potential for us to reach people without everybody burning fossil fuels.Lizzie Lasater
How do online yoga teachers make money?
There are a few ways that you can charge for online classes, which we’ll cover in-depth later in this post.
Here are a few common ways yoga instructors are charging for online classes on Thinkific:
- Self-serve Classes – pre-recorded yoga lessons that students can take at their own pace.
- Live Online Classes – just like you’re used to, except you’re teaching in front of a camera instead of an audience.
- Yoga Memberships – students pay a monthly subscription fee in exchange for new content or mentorship from you every month.
- Bundles – offering a bundle discount is a great way to encourage students to purchase multiple classes from you.
We suggest offering a range of options and experimenting with your course pricing to find a price point that works.

Steps to teach yoga online
There are five key areas this article will cover to get you started teaching yoga online:
- Step 1: Choose your yoga course topic and positioning
- Step 2: Decide your course format and teaching method
- Step 3: Get your tools and equipment for teaching online
- Step 4: Create your first online lessons
- Step 5: Market your online course
Step 1: Choose your yoga course topic and positioning
The first thing you need to do is decide exactly who and what you want to teach. This will help you create better quality and focused content, and focus your marketing efforts towards prospective students.
For example, are you teaching yoga teachers? Are you teaching students? Or are you teaching children?
Asha Yoga uses Thinkific to teach Kids Yoga – a great example of the benefits of positioning your course for a specific audience.

When deciding what kind of courses to create, consider whether you’re serving a beginner or advanced audience. You could craft a series of classes that start out easy, and get progressively more advanced to lead into your more advanced training.
A beginner class may have easier sequences like Downward Dog, while a more advanced class might have sequences like Hanumanasana or the Dragonfly Pose (Maksikanagasana).
You could also structure your classes based on the type of yoga (ie. Bikram vs Hatha), the type of student (ie children vs seniors), or the end benefit (flexibility and balance vs concentration and meditation).
Not sure what your unique angle is? A good place to start is by asking your existing students for feedback and doing a bit of research to identify gaps in the market, and opportunities to differentiate your offering.
Here are a few questions to ask to help you determine your course positioning:
- What does your ideal student look like?
- What level of skill do you want to teach online?
- What areas of expertise and skills set you apart from other yoga teachers?
If you are already teaching, make sure to ask your students what they enjoy most about your teaching style, or what challenges you’ve helped them overcome. Consider how that translates from teaching in-person to online.
If you’re new to teaching yoga, do a quick search on Google or Quora for terms like ‘yoga classes online’. You’re bound to see a ton of examples and questions on what people want to learn. Make a note of what online yoga schools are already out there and what they teach, what people are searching, and where you could fill a gap. You can also use tools like Ubersuggest to research what search terms are most popular on Google.


Step 2: Decide your course format and teaching method
It’s important to plan out your curriculum before you start teaching online because this will determine how to record and produce your material.
Yoga teachers have several options when it comes to setting up their online classes. You may want to be more hands-off, with online classes that your students can take at their own pace. Or maybe you and your students enjoy the opportunity to engage in a live format.
Option 1: Self-serve yoga classes
This approach allows students to work through a series of pre-recorded classes/modules that your students can take on-demand.
The benefit of self-directed classes is that they can be a passive income source, meaning that once you’ve set up your classes, people can enroll and take the class with no intervention from you.
For example, Cinderella De Groot created her Stress Relief toolkit on Thinkific to help her students cope and manage stress on demand.

The challenge with self-serve yoga classes is that some of your students may enjoy the live interaction, ability to ask questions, and the opportunity to get feedback. If you want to retain an element of live interaction, the next option may work best for you.
Option 2: A combination of self-directed and live classes
Many online yoga instructors have a combination that includes live and self-directed content.
Lizzie Lasater loves doing live courses because of the interaction and Q&A she can have with her students while they are learning. All of her courses are designed to be self-paced, but include a live component, where they encourage people with special pricing and discounts to enroll in live classes for a period of time.
Some of her students enjoy following along with the lessons in real-time, while others prefer to work through pre-recorded lessons at their own pace.
On Thinkific, Live Lessons allow you to schedule and host live interactive video lessons directly within Thinkific using Zoom.
With Thinkific’s new Live Lesson feature, it makes it easier than ever to connect with your audience and deliver live training or coaching. Best of all, since your audience does not have to leave the member area, they will be more engaged and highly focused on you. – ROB GALVIN, Thinkific Expert
Option 3: Online yoga membership site
The all-encompassing option is to offer a yoga membership. With a membership model, students pay a monthly subscription fee in exchange for new content, mentorship, or live sessions from you every month.
Membership sites differ from standalone courses and live classes in a few key ways, including in the expectations of your students and what is required of you, the site owner. For example, here are a few elements that make up a typical membership site:
- Recurring revenue – Instead of a one-off purchase, customers pay you monthly for access to resources and on-going live classes.
- Ongoing training – Students expect you to release new content on an ongoing basis.
- Community building – Membership site students typically expect access to you, the instructors, and to each other. Access to a community of like-minded people is a major selling point of most membership sites.
- Emphasis on retention – The membership model relies on retention. By maximizing retention rates, you increase the lifetime value of your customers – ideally to a greater value than the one-time purchase price of an online course.
For example, Lasater Yoga sells a monthly yoga teacher membership call on Thinkific for $19/month – priced as if you were to go to a studio. The course is designed to equip yoga instructors with the knowledge to improve their teaching methods, featuring yoga experts and instructors from around the world… They have yoga teachers from around the world join them to talk about teaching Yoga.

Step 3: Get your tools and equipment for teaching online
Next, you’ll need to get the right equipment and software to teach yoga online. In this section, we’ll cover the common tools that Yoga teachers use to run their online studios, including:
- Choosing an online course platform to host your content, and bill your students
- Setting up your recording studio to produce your content
Choosing an online course platform
Many online yoga instructors use Thinkific to build their own virtual yoga studio, here are a few reasons why they love using Thinkific:
- Deliver your lessons on autopilot. Once your classes are loaded into your course site, your students get access to them in the order you’ve arranged. So whether you’re offering a foundational series for beginners, or a sequence of lessons to help your students build advanced techniques, your students can easily access them on autopilot.
- Easily upload and update any materials. Want to re-record a video, audio sample, or update a yoga routine? You can drag and drop your materials around each course, to keep your lessons organized without disrupting the learning experience for your students.
- Full control and customization. Unlike marketplaces where you have no control over your course pricing or branding, you can fully customize these on Thinkific. And you’ll always have full access to any student information like emails or lesson progress.
- Simplified payments and communication. Any revenue you earn goes directly to you as the site owner. Thinkific integrates with popular payment processing tools like Paypal, Stripe, and Quaderno so you can automate payment and tax calculation when teaching students from different countries.
We use Thinkific as our online course website. That’s the way we’re sharing our content. The advantage of an online course platform like Thinkific is that they handle the login features, so that anyone who’s accessing your material will have to log in, and your videos live there.Lizzie Lasater
Did you know that you can sell your first 3 courses on Thinkific for free? Sign up for a free account to start building your courses and enrolling students today.

Setting up your recording studio
Step 1: Finding Recording Space
You’ll need to find a space to record before you can make your course. You can get creative with how you find space.
Thinkific course creator Cinderella De Groot traded a Latin Dance Class for recording space with the owner of a local studio that she attended as a student.

I filmed at Carlsbad Village Yoga Co-op in Carlsbad, San Diego. I actually have been taking some classes as a student at that yoga studio and reached out to the owner if I could use it to record my online Toolkits (course). She said yes, so I was stoked. In return, I taught a Zoom session on Latin Dance for their students, since due to Covid-19 live classes were not possible. Cinderella De Groot (Body2move) recording at Carlsbad Village Yoga Co-op
Step 2: Setting up a DIY online yoga recording studio
Lizzie Lasater offered some solid video content production tips on her YouTube channel.
Do
| Don’t
|
Here are a few recommended steps to planning your online yoga recording set up:
1. Rehearse
…much more than when you teach live. Make sure you can be fully seen and heard before you record.
“I suggest you map out what you’re going to do in your class that you’re teaching online. Quickly before you start, double-check that your camera doesn’t cut you off when you stand up, or raise your arms.”Lizzie Lasaster
2. Camera set-up
You need a way to film yourself while you’re talking and doing yoga.
I use my computer mostly, up on a couple of yoga blocks. Sometimes I use my Ipad. I like to use my computer and the Ipad because they’re connected to the internet, and you can immediately transfer that information online. I wouldn’t suggest using a phone because of the long skinny formatLizzie Lasater
Here are a few low and high budget options for recording your yoga class:
| Low Budget ($30) | High Budget ($1,150) |
| Smartphone (Horizontal), mounted on a tripod. Make sure your phone is able to capture at least 4K resolution (most cameras can). Before you hit record, make sure you have enough memory storage on the phone and that your framing captures all of you. If you’re unsure of the framing, another tip is to mount your smartphone and film from the front camera so you can look at yourself on the screen while you teach. | DSLR + Lens (wide lens of 24 mm or lower for wider angle) If you have the budget, shoot with a DSLR, especially the ones where the screen can flip out, so you can view yourself as you teach. |
3. Invest in a microphone
When you’re teaching yoga, you’re often further away from the camera, and so you want to be able to capture that sound. Lizzie recommends the Blue Snowball Microphone, and emphasized that you need a good microphone.
People will forgive poor quality video in homemade things, but they will not forgive poor quality audio.Lissie Lasater on her youtube channel
Here are a few other microphone recording recommendations for online yoga teachers:
- Shotgun Mic – You can use a Shotgun mic ($53.95) – For more direct recording, pointed at the source of the sound. This is great if you’re in one position and not moving around much.
- Snowball Mic – You can use a Snowball Microphone ($49.95) for a wider area of focus, or even multiple people speaking (like a podcast). Also a good mic, if you plan on doing Voice Over layered over your footage and you can record later.
- Lav Mic – If you have the budget, we recommend a Lav Mic Set-up ($239) – If your Yoga class requires you to move around a lot while you speak, invest in a Lav Mic set up. This gives you the freedom to move around as you teach without losing audio quality.
4. Plan your lighting set-up
Think about how you’re going to light yourself. Make sure there’s not too much light coming from behind you. Look at what lights you have at home, especially if you’re teaching at night.
Here are a few lighting options to help you be seen!
- Natural – Shoot near a window for natural, overall light. Make sure the window isn’t BEHIND you, or your background will be overexposed. If you can position your set up so the window is beside you, that’ll be the best. If you have no choice but to have the window behind you, a good tip is to drape the window source with an opaque white curtain to soften/diffuse the light coming in.
- Softbox – Use a cheap, softbox light that lights a large area with softer light. Make sure you position your lights far enough away to have the light fall softer and on a larger area. This method works if your space is big enough (too close, everything will look harsh and overexposed). If you can, make sure you buy LED bulbs for these softboxes, as LED lights do not heat up.
- DIY lighting Softbox (using a wall) – If your space is small and you have no choice to use a softbox, one tip is to point the light at a white wall (not at yourself) so the light can bounce back from the wall, onto you, creating a softer, wider source of light.
5. Recording your Yoga Videos
Mac has a way to record a video straight onto your computer, but Lizzie likes to use Zoom to record.
The advantage of using a computer or a tablet to record is that they’re connected to the internet, so you can access and upload your content immediately. She also recommends doing it in one take, to avoid investing time and money to edit.
6. Hosting & Billing for your content
You need a way to share lessons with your students.
The drawback of using dropbox is that the files can be downloaded or shared to anyone with the link. You could use PayPal or stripe for your billing, but then you’ll need to manually give your students access to the content.
That’s why Lizzie Lasater recommends using Thinkific to host and bill for your content.
The advantage of an online course platform like Thinkific is that we handle the hosting, billing, and giving your students access to the content once they’ve paid.
Step 4: Create your first online yoga lessons
Where do you start at mapping out your course content? Follow these next steps, and you’ll be on the right path!
1. Create your course sales page
A good first step is to create a sales page for your course on Thinkific. We recommend this for two reasons:
- One, it will help focus your efforts in defining your value proposition and mapping out a course outline.
- And two, it gives you a sales page to start driving traffic to. Don’t be afraid to spread the word about what you’re planning to create, even before you’ve started creating your content! This method is called pre-selling your online course, and it’s a great way to validate demand for your content.
Assuming you’ve validated demand for your course, it’s a good time to start building out more content.
Key features of a Sales Page:
- A Compelling Headline – to grab your reader’s attention and make them want to keep reading. Think of it as the ad for your sales page. If all the user sees is your headline, would it make them want to keep reading?
- The Opening Story & Value Proposition – present the problem that they are experiencing and remind them of the cost of not solving it. Show your reader that you understand their current pain or frustration by explaining how you too experienced it in the past.
- The Solution – This is where you explain what exactly your course teaches and how it can save your students a lot of pain and frustration.
- The Benefits – Clearly state the benefits that our course brings to our students. If you have a number of different benefits, separate it out into bullet points so that it’s readable.
- Bonuses – List out the bonus materials and resources that are included in your course. These are meant to supplement your course material and enhance the overall learning experience for your students.
- Testimonials – If readers are still not convinced that your course can do what you promise, you need to show them proof. Include testimonials from past students and describe how your course helped them. With Thinkific, you can collect reviews from your students, and display those reviews on your course sales page.
- Credibility – Why should someone trust you to teach them yoga? This is where you can boast about your certifications, achievements, and showcase your expertise.
- Frequently Asked Questions (FAQs) – The FAQ section should overcome any last-minute objections and concerns that your reader may have. If you were giving a 1-on-1 sales presentation of your course to a potential student, what questions would they likely ask you before they decide to buy your course?
- Pricing – Technically this part is taken care of for you by the Purchase Buttons that are automatically added to your Thinkific course page. Offering bundles is a great way to sell more of your product.
- Risk Reversal – A common risk reversal technique is to offer a 100% money-back guarantee within a specific period of time, such as 30 days. This takes all of the risks of buying your course off their shoulders. You’re basically saying, “I’m so confident that you will like my course that I’m willing to give you all your money back if you don’t.”
2. Create your yoga course outline
Your course should facilitate the transformation of your student from their current reality, to their desired future.

To create your outline, you’ll want to identify the following points
- What stage your student is at before enrolling your course (Point A)
- What the student’s desired abilities and expectations are for taking your course (Point B)
- The key steps, topics, and skills they’d need to move from their current state (Point A) to their desired state (Point B)
As much as we’d all like the ability to fast forward through challenges, your student isn’t going to jump from A to B overnight – you’ll need to consider what incremental learning steps your student needs to take along the way to make their transformation.
Once you have this rough outline down, it will be much easier to decide what to include in your course whether it’s pre-recorded videos, reading materials, or live workshops.
“If you’re used to teaching in person, you’ve got that figured out. But if you’re filming yourself online, you have more moving parts. More bells and whistles to deal with and it can be flustering at first to manage the tech and to teach, so know exactly what you’re going to teach.” LIZZIE LASATER on her Youtube Channel
Step 5: Market your online yoga studio
Last, but not least, we’ll cover online marketing strategies to help you grow your business and sell more courses.
1. Master the yoga marketing funnel
The first step is to understand the stages a customer goes through before deciding to purchase and consider how your content can be crafted with these stages in mind.
The AIDA (Action, Interest, Desire, Action) model is based on individual stages that lead up to a customer ultimately purchasing from you:
- Someone can’t purchase from you if they don’t know about you, so first, you’ll need their attention.
- Then, you need to pique their interest by demonstrating your value and differentiating yourself from other yoga studios.
- Finally, they need to decide if they desire your product before they take action.
Here’s a breakdown of the stages, and some tactics you can use at each stage:

Now let’s explore a few marketing best practices for yoga instructors.
2. Polish up your website
If you’re any good at marketing, you’ll want to be driving traffic to your website. Your website is the face of the business, so it’s important to have a polished presence.
Every obstacle between your visitor and the course check-out page limits your sales potential.
With that in mind, it’s important to clearly present the value of your courses, and provide links to courses that they can take.
Here are a few examples of great yoga instructor websites on Thinkific:
Cinderella’s Stress Relief Toolkit page clearly states the problem that her course solves.

Lizzie Lasater has an extra landing page that helps users find the most relevant courses for them. This is a user-friendly way that summarizes her digital products with their unique value propositions.

Lasater Yoga’s Yoga Teacher Training page lists eight key learning areas, so their students can understand how it will help them in their career as a yoga teacher.

Asha Yoga’s website lists the benefits you’ll get from their classes, and how they’ll help you de-stress, build strength, and a better connection with your body.

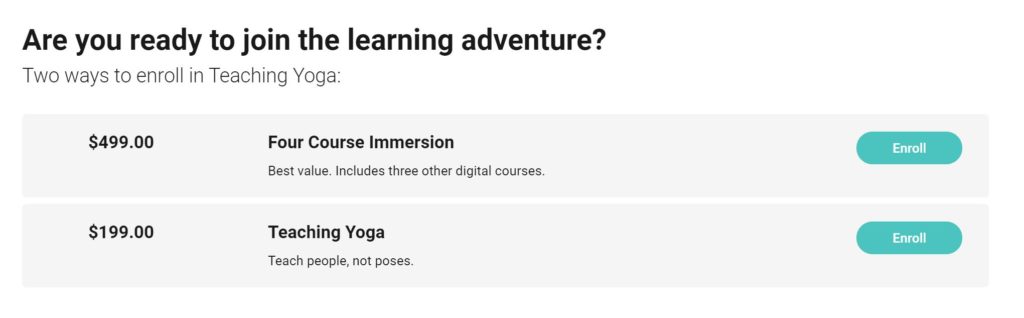
Offering a discount for purchasing multiple classes is a great way to increase your sales.
Lasater Yoga gives students the option to either buy a single course or a bundle of courses together for more value.
3. Use lead magnets to grow your email list
Since teaching online means you’re running a digital business, you must start to build your email list if you haven’t already.
Even if you have tons of traffic to your social media or course site, only a small portion of that traffic will actually transpire into paying customers.
Lead Magnets (free downloadable resources) are a great way to build your list. This could be a recorded class or PDF of Yoga sequences that you teach your students. When people download your free resources, you’ll get their email in return. You can use nurture emails to guide them towards your paid programs by sending them information about all the helpful training you have available.
Lasater Yoga has a newsletter through Mailchimp called “Sunny Savasana Series” to engage their followers on a monthly basis.
4. Build a social media strategy
Beyond being the ultimate procrastination tool, social media can be a great way to keep your existing students engaged and get in front of new potential students.
Decide what your goals are with social media before jumping onto every platform under the sun:
- YouTube, Facebook, and Instagram are great ways to offer tips and free live classes.
- Facebook pages are great for reviews, going live, keeping your audience engaged with new content, and schedule updates.
- Instagram is a great way to build social proof by sharing photos and videos from your classes and highlighting your top students.
Asha Yoga teaches live classes on Facebook to engage their followers and build trust by giving potential customers a sample of their class.

Posting on multiple platforms on a regular basis can be a challenge, so a social media management tool like later.com can help you streamline your social media efforts by scheduling your posts to all of your pages.
5. Go Live & Build a presence on youtube
As the old adage goes: try before you buy!
Free live yoga classes are a great way to build a following and get in front of potential students. Youtube and Facebook Live can help you offer a taste of what your courses are like before someone signs up with you.
Going live can also give your page a visibility boost because platforms such as Facebook, YouTube, and Instagram tend to favor live videos.
It’s more challenging to do pre-recorded content alone with no interaction or feedback. It’s much easier to record a live class where you can see the chat, and see what the students are saying, and feel that there’s something going on.
Lizzie Lasater
Lasater Yoga has 5,800 followers on youtube, where they share techniques, anatomy, and frequently asked yoga questions.

A few tips for your YouTube (or yoga-tube) channel:
- The key is to give away enough value to capture their attention while offering an incentive to take your classes.
- Write a good video description below the video:
- Share some knowledge related to your video, using keywords related to the class that you’re streaming
- Talk about your paid offerings, and link to your course
- Add links to your website, and other social media channels in the description
How to be a good online yoga teacher
Don’t try to be some perfect version just because you’re recording digitally
Just like yoga in a room with students, people are looking, i believe, to have an authentic connection with an authentic human being. And people will forgive you everything that can and will go wrong technology-wise as long as you are yourself.Lizzie Lasater
Keep the right energy throughout the session
“I’m used to teaching live classes, where you can tune-in to the people and engage. You know your audience; beginner, intermediate, advanced etc. that you can adjust your adjustments and coaching too. With online you don’t have that, therefore you need to be more clear, slow, and keep the right energy throughout the session to get across the camera.”CInderella De Groot
Related: 10 Steps To Creating A Wildly Successful Online Course
Where to start?
By reading this post, you’ve embarked upon a journey to share your love of yoga and your expertise with the world.
You’ve already started, even if you haven’t actually done any of the exercises yet. The only question is, are you going to finish? Or will you leave it unfinished and deprive the world of your expertise?
Thinkific can help you create and sell your online yoga content all from one place, and you can sell up to 3 courses on our platform for free!